Create and order AprilTag calibration boards using our online pattern generator, or upload your own AprilTag artwork if you already have a finalized pattern. Every board is produced at true 1:1 scale to ensure dimensional accuracy from preview to finished print. Read More
This video demonstrates a localization system using AprilTags.
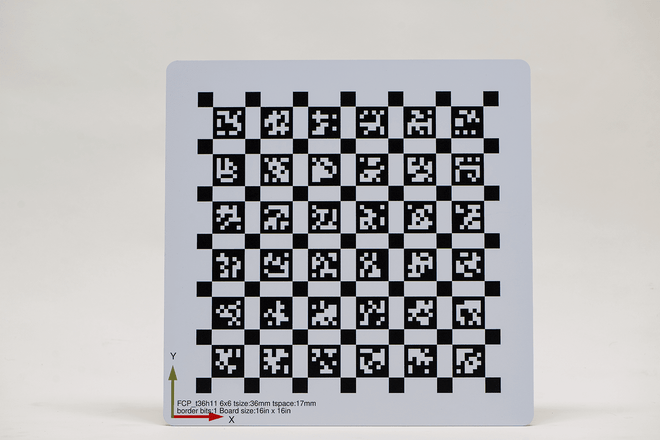
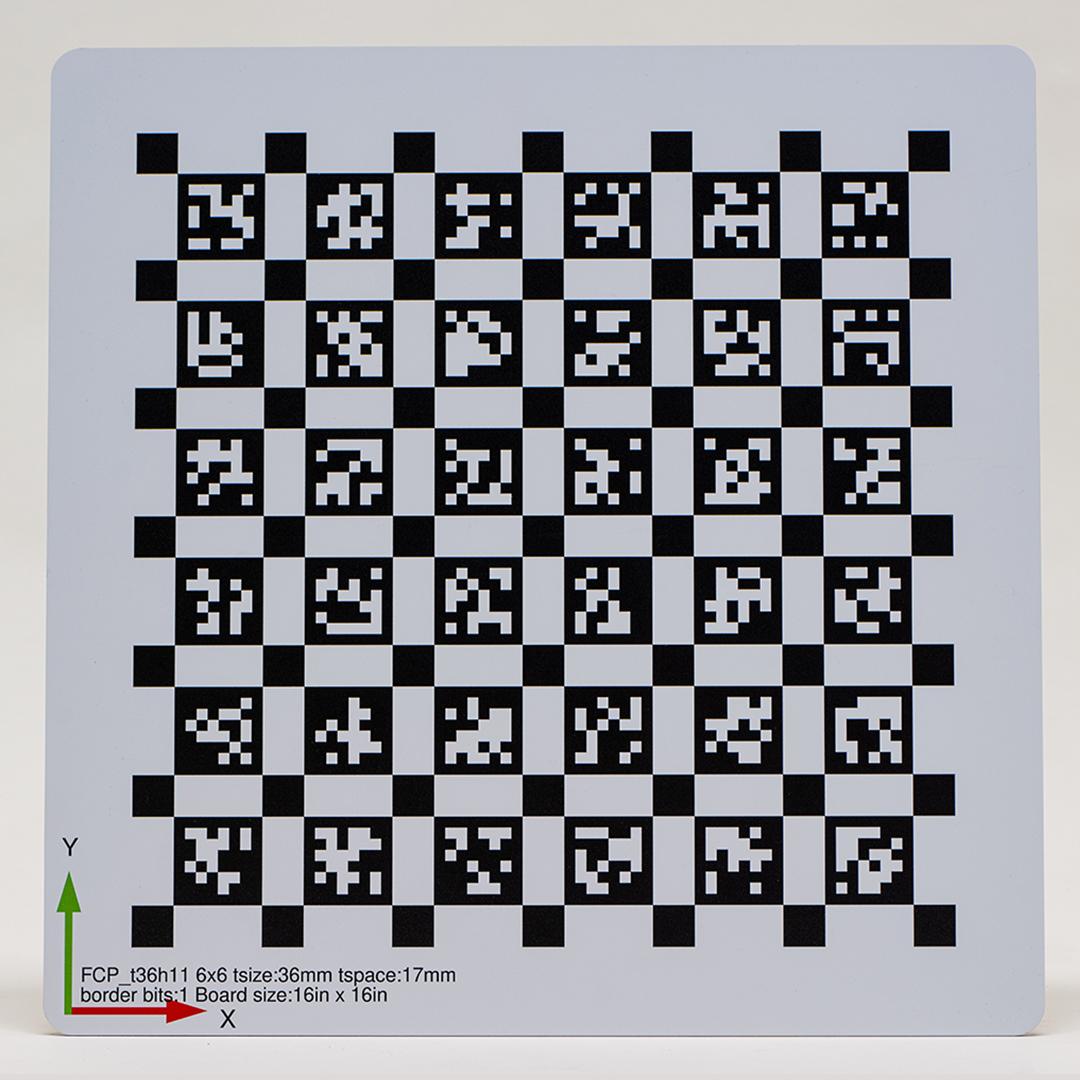
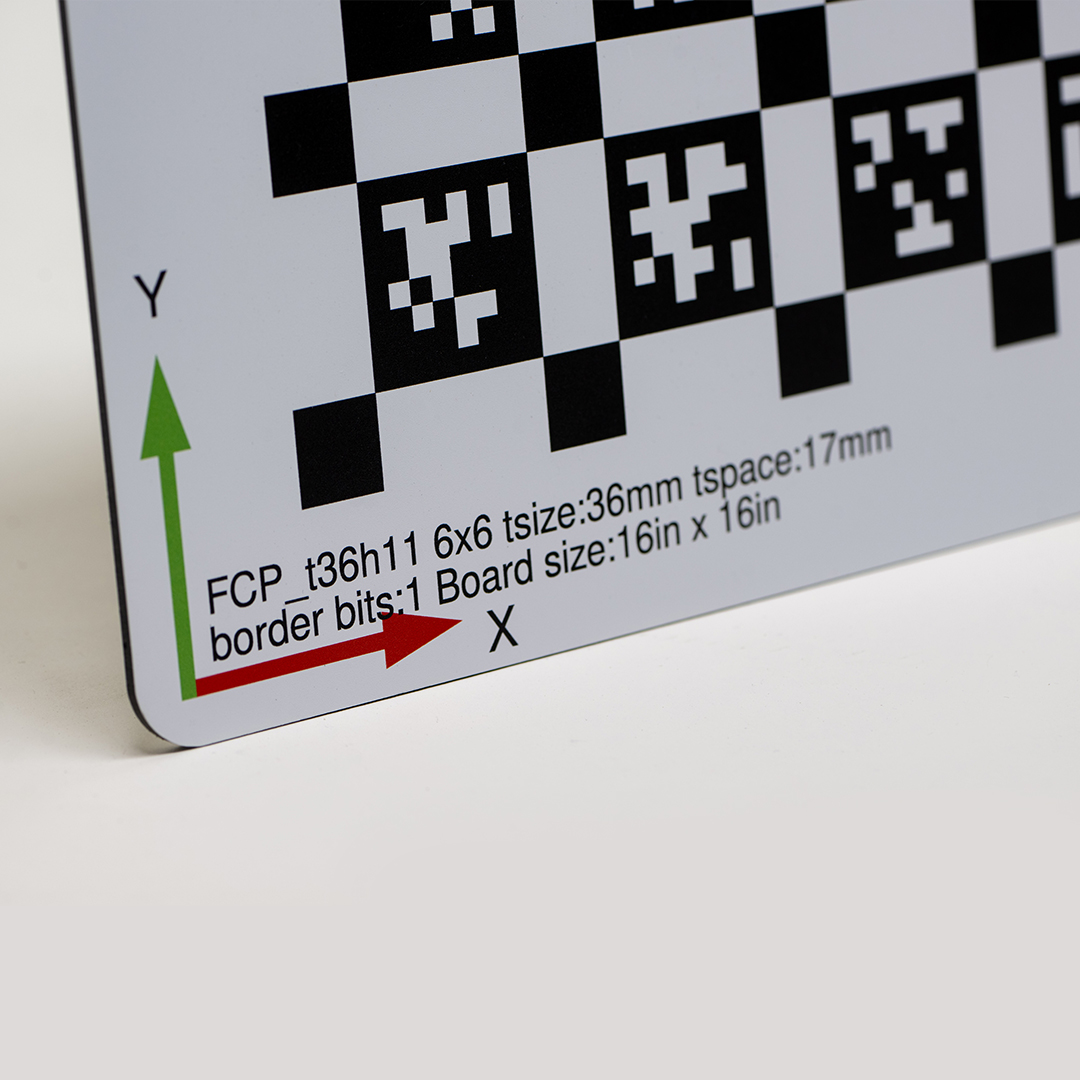
AprilTag Calibration Targets
High-precision AprilTag targets professionally printed for robotics, computer vision, and camera calibration applications.
AprilTag Calibration Target Features

Vibrant UV Direct Printing

Precision Manufacturing
Understanding that vision systems depend on precise components, we have automated the cutting process in our facilities to ensure your calibration board delivers the most accurate results.

Custom Shapes, Drill Holes, and More
Our "Special" cut option offers fully modified board shapes. We provide unique custom shapes, specialized drill hole sizes, and specific placements. This option is ideal for creating cost-effective custom test targets or specialized parts for research and development. Learn More

Wide Range of Sizes
We offer a wide range of custom sizes for small and large fields of view, ranging from 4" x 4" to 48" x 96". There is a manufacturing tolerance of ±.004" in either direction.

Rounded Corners
Rounded Corners provide safety with sleek, professionally machined rounded edges for the corners of your calibration board.
Material Options

Aluminium Composite Material Specs
ACM Material Specifications
Polyurethane – Technical Material Specs
Polyurethane Material Specifications
Optimized for Reliable Tag Detection
(Ultra-Matte Finish · Near-Lambertian Surface on ACM)
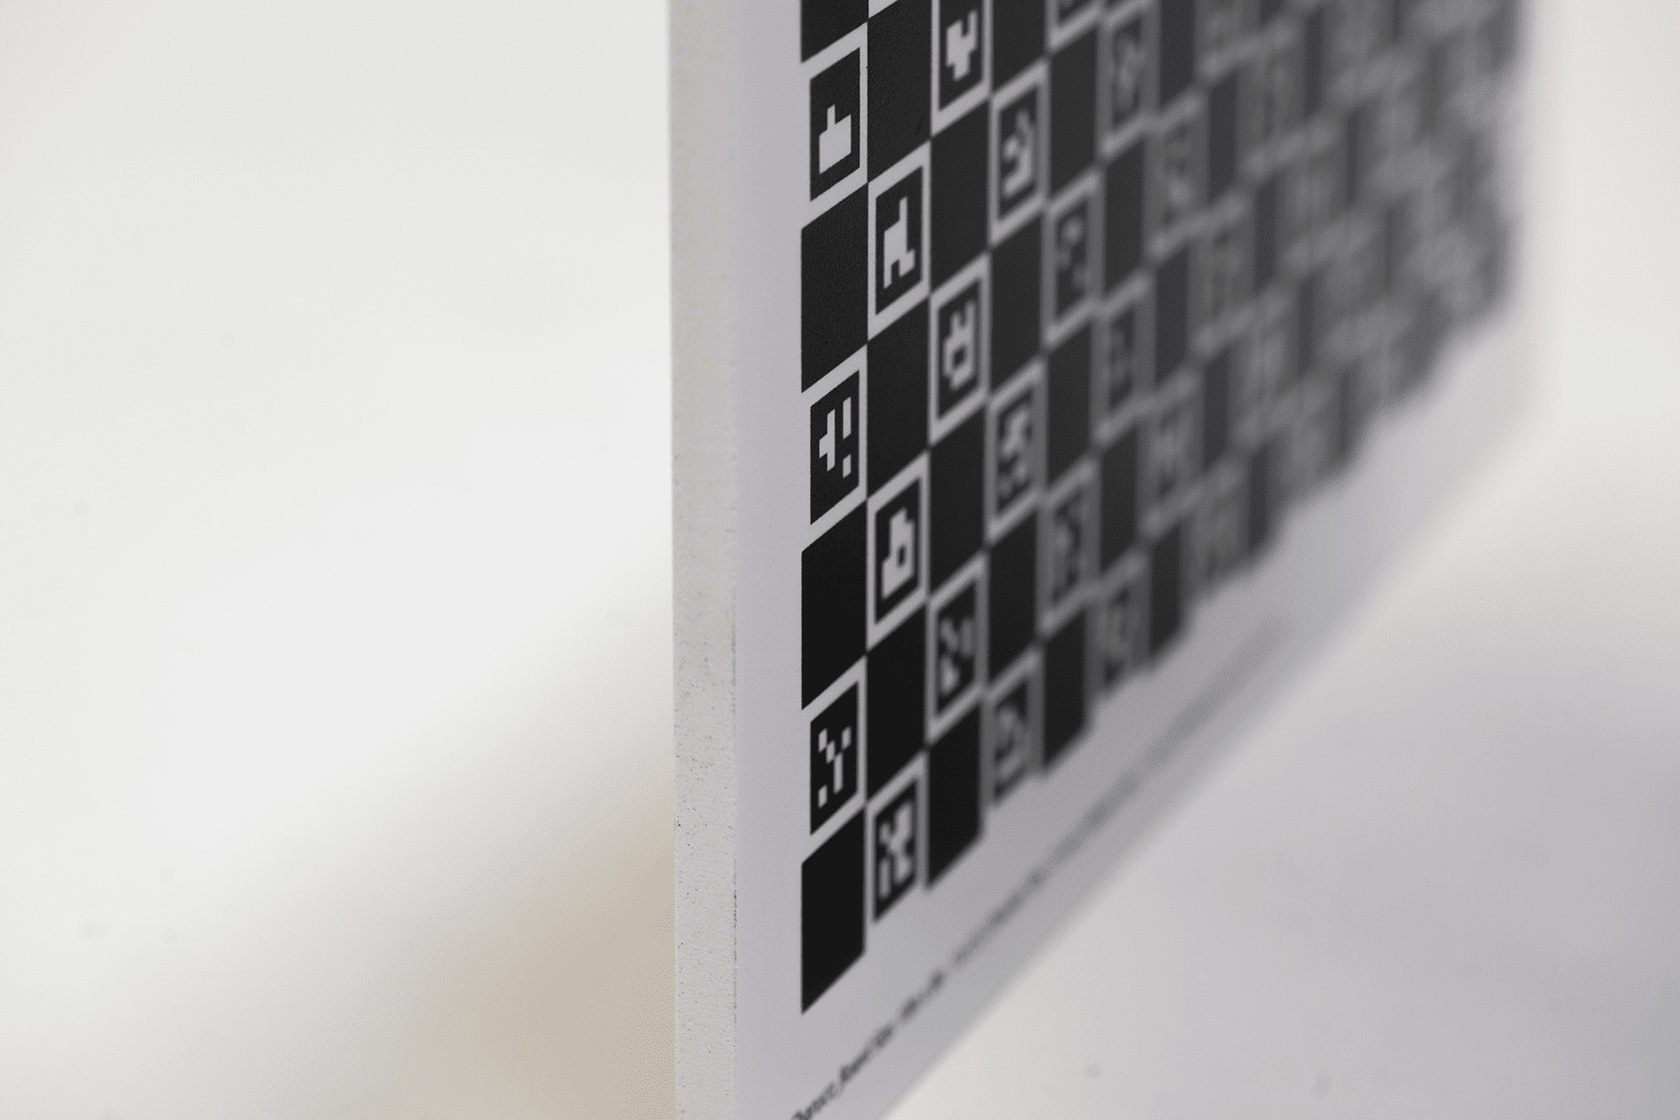
All AprilTag targets are printed using our ultra-matte finish by default. When produced on ACM (Aluminum Composite Material), the full-coverage UV-cured white ink layer produces near-Lambertian reflectance. This antireflective surface reduces glare and maintains consistent black-to-white contrast across viewing angles and lighting conditions.
This is particularly beneficial for AprilTag detection and decoding, where reflectance variation can lead to false detections or missed tags—especially when working with active or IR-based sensors.
The UV-ink surface on ACM is scratch-resistant, durable, and suitable for long-term indoor or outdoor use.
Getting Started on Your Apriltag Boards
To get started, you will need a pattern. You can use our pattern generator to complete your order or upload your own design. Throughout checkout, you'll choose your preferred finish options, enter each quantity, and complete your order!
Pattern Generator
Customize AprilTag calibration boards by controlling board size, tag family, tag dimensions, spacing, and layout in our online generator, or upload your own finalized AprilTag pattern. All designs are generated at true scale to ensure dimensional accuracy.
Other calibration grid types, including Checkerboard, ChArUco, Kalibr, and circular grids, are also supported.
Upload Your Artwork
To start your order with your custom design (any pattern type), click the "Upload Artwork" button below. Next, drag all your files into the file uploader and update your board dimensions and finish options. After that, review and approve your online proofs, and then wait for delivery! View File Requirements & Helpful Ordering Tips.
- Accepted file formats: .PDF, .AI, .EPS, and high-resolution full-scale .tiff, .tif, .jpg, .jpeg, and .PNG files.
Helpful Ordering Tips
- File Submission: Always submit full-scale files at a 1:1 ratio and adjust the product dimensions to match your file size. If necessary, use decimal points to avoid unwanted scaling.
- File Format: For optimal print results, upload files in vector PDF or AI format using CMYK color mode.
- Proofing Process: Double-check the dimensions of your file compared to the product size during the proofing process. Ensure that both sizes are at a 1:1 ratio. If they are not, you can either remove the files and upload the corrected versions or adjust the product finish size to match your file size (be sure to repeat the first step).
- Responsibility: FoamCorePrint is not responsible for incorrect patterns or finished product sizes resulting from improper scaling of customer-submitted artwork.
- File Review: We encourage first-time customers to submit their files for review. Please contact our customer support via live chat or email before placing your order, so we can check all print files for you.
AprilTags: A Versatile and Robust Visual Fiducial System
AprilTags are usable in a wide variety of applications, for instance, camera calibration. Once organized in a uniform sequence, you can use AprilTag makers like other calibration patterns.
So, what are AprilTags? In what instances can you use AprilTags, and under what conditions?
What can affect the accuracy of your results? How do you solve these issues to ensure pinpoint outcomes?
This guide takes you through the AprilTag frequently asked questions to ease your future applications with these tags.
What are AprilTags?
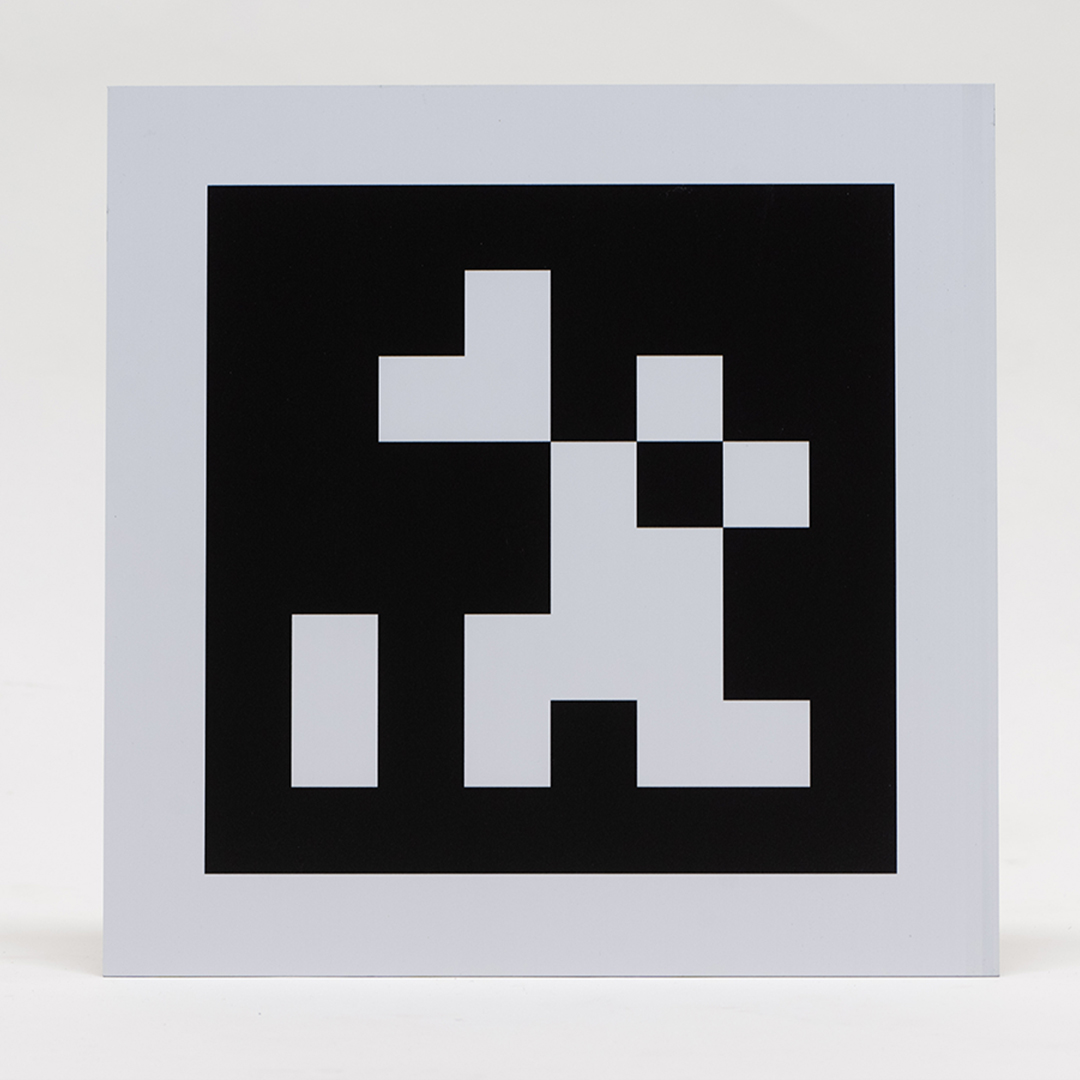
AprilTags refer to the visual fiducial system, usable in numerous applications like camera calibration, augmented reality, and robotics. Apriltags offer a method of 3D positioning and identification, even under reduced visibility.
These tags function like barcodes. They store little quantities of information (tag ID) while simultaneously facilitating straightforward and precise tag pose estimation in six dimensions (x, y, z, roll, pitch, yaw).
With the origin of the AprilTags project being the University of Michigan, you can learn a lot about this AprilTag detection software from the dedicated research on the subject on their website. The team provides implementations in C and Java in reading AprilTags from your camera, and you can find more tag-reading implementations online.
Besides this software, an MIT (Massachusetts Institute of Technology) student developed a C++ implementation. Their website offers printable AprilTags encompassing multiple tag families, which you can access in PDF format.
ROS Implementation
Hydro and ROS Groovy lack inbuilt AprilTag identification software. However, it is possible to convert the MIT C++ implementation code into a functioning ROS package to produce AprilTags seen in your camera image as TensorFlow messages and transforms.
Experimentation Results
April Tags can achieve accuracy within four centimeters from the original pose if your camera lies within a two-meter radius from your tag. The distance of the robot from the tag affects the precision inversely.
Potential Issues
There are various crucial aspects to consider before applying April Tags.
Pose Estimation Accuracy Depends on the Camera You Use
Using a very affordable camera, say costing under $20, can immensely affect accuracy. Your tag detections with such a unit are unlikely to provide reliable outcomes. Moving such a camera while detecting your Apriltags can further degrade the quality of your output.
With a more premium camera, the quality of your results is likely to be good. You can achieve pose estimation accuracy with proper tuning of parameters.
Estimation Accuracy Depends on Tag Motion
As your robot moves, especially during turning, pose estimation can veer off accurate results by even over 20 degrees. The range can also vary by up to 75 centimeters.
The best approach is halting immediately an April Tag gets detected. This way, the likelihood of achieving a more precise pose estimation is higher.
Tag Distance Also Affects Your Pose Estimate
Typically, you can achieve pose accuracy up to about 2.4 meters. Beyond this level, the results tend to vary substantially. Consequently, a robot shouldn't localize unless within the 2.4-meter threshold range.
Determining Ideal Camera Configuration Stipulations is Crucial
As seen, the inaccuracy of robots can result from several reasons. Another potential cause of localization inaccuracy is the failure to meet the set requirements for the given hardware you are using. An example would be using an unsuitable focal length.
For instance, if your Kinect sensor has a smaller focal length than the required value in your software, your outcome may vary. The robot assumes it is closer to your tag than true, resulting in an imprecise tag size approximation.
With the usage of ideal parameters, precision improves by a few centimeters within close range and increases immensely when the distance increases.
Frame Transformation
When using the April Tag node, an issue is your frame's dependency on the moving body's orientation. The body’s orientation can alter your frame and make it challenging to achieve a uniform coordinate system.
The April Tag transform is the source code, which though achieving frame consistency, can be quite noisy. A RANSAC filter can help you with this issue. Relying on the IMU (Inertial Measurement Unit) orientation rather than the April Tag orientation during transformation can help address the errors.
Substitutes
Besides AprilTags, you can also use AR-tag to localize or estimate poses, though these get primarily used in Augmented Reality. And while they may not be as good as Caltags, April Tags offer more precision than ARtags, especially when lighting conditions are below the required levels.
Camera Calibration Using AprilTag Markers
AprilTags support a wide variety of usages as visual markers in localization, object detection, and as a camera calibration target. Although similar to QR codes, AprilTags encode less information. You can, therefore, decode AprilTags faster, a vital feature in various fields like real-time robotics.
We shall use the readAprilTag function in this example to localize and detect AprilTags in calibration patterns. This function accommodates all standard tag families.
The example also performs end-to-end calibration using Computer Vision Toolbox™ functions. We replace the checkerboard pattern with an evenly-spaced AprilTags grid.
The benefits of using AprilTags as calibration model are:
- Better feature point determination
- Consistency
- Repeatable detections- they are typically easily detectable in real-time
You can also use the method below with other calibration patterns like a circle grid rather than the default checkerboard patterns.
Step 1: Calibration Pattern Generation
Download and draw up your tag images. You can download pre-made tags for all supported families with a web browser from AprilRobotics.
You can use a helperGenerateAprilTagPattern function to generate calibration targets using your tag image for a particular placement of tags. You can obtain the pattern image in calibPattern, which you can then use to print your AprilTag pattern (from MATLAB). The example employs the tag36h11 family. These offer a worthwhile trade-off between false-positive detections and detection performance.
Applying the readAprilTag function to the above pattern produces detections in which the border positions of individual tags fall into the same group. You can use the helperAprilTagToCheckerLocations function to change the above arrangement into a column-major positioning like a checkerboard.

Image source (tag36h11 family): screenshot

Image source (tag36h11 family): screenshot
Image Preparation for Calibration
You must print the formulated calibration pattern on a flat surface then use the camera you want to calibrate to take the pattern's images.
As you prepare your images for calibration, here are a few issues to keep in mind:
- Consider printing your Apriltags on a consistently flat surface not prone to deformation from agents like moisture. Paper is therefore not the best object to use.
- Any pattern imperfections like uneven surfaces can lower calibration precision, given these procedures assume your pattern is planar.
- Camera calibration needs a minimum of two images of your AprilTags but increasing the number to about 10 to 20 images produces more exact outcomes.
- Picture various images of your Apriltags and let the Apriltag pattern occupy most sections of your image and cover your entire field of view. For instance, capture images of your Apriltag pattern on all the edges of your image borders for you to ultimately detect lens distortion.
- Ensure your AprilTags are wholly visible within the taken photos. Pictures with partly visible AprilTags get rejected.
Step 2: Detect and AprilTag Localization
Use the helperDetectAprilTagCorners function to identify and localize your AprilTags from the captured pictures. Arrange the photos like a checkerboard pattern to 0ffer you the vital AprilTag points for the calibration process.
Step 3: Generate World Coordinates for Your AprilTags
The generated AprilTag print appears in a manner like that of a checkerboard target. Therefore, you can determine the world coordinates for the coinciding image coordinates you got in imagePoints with the help of the generateCheckerboardPoints function.
The tag size replaces the size of the square, and you can obtain the board size from step two. Measure the size of your tag between your tag's exterior black edges.
Step 4: Camera Parameter Estimation
Use the estimateCameraParameters function to approximate your camera's parameters. You can do this using the points that coincided between your photo and the world coordinate system.
Gauge how precise your extrinsic camera parameters ( those indicating the planes of your AprilTags in your captured photos) and the calibration are based on your findings.
Assess the positions of the detected picture points and your reprojected points gotten from the approximated camera parameters.
Supporting Functions
There are three main AprilTag supporting functions during the calibration process:
- The helperGenerateAprilTagPattern function formulates AprilTag-based calibration models.
- The helperDetectAprilTagCorners function can detect AprilTag calibration models in images.
- The helperAprilTagToCheckerLocations function changes AprilTag corners into checkerboard corners.
Wrapping Up
Although the message in the example above shows how to use AprilTag markers in camera calibration, it is not specifically tied to AprilTags. The same method is usable in several applications with other calibration models.
The estimateCameraParameters function vital in obtaining your camera parameters needs:
- WorldPoints: Coinciding world coordinates of the crucial points of your calibration pattern
- ImagePoints: Vital points in image coordinates of your calibration pattern sourced from the recorded images.
Provided you can achieve these two necessities; you can follow the above calibration workflow.
Reviews for AprilTag Targets
Rating
Frequently asked Questions
FAQ
YOU MAY ALSO LIKE
Notify on stock availability